
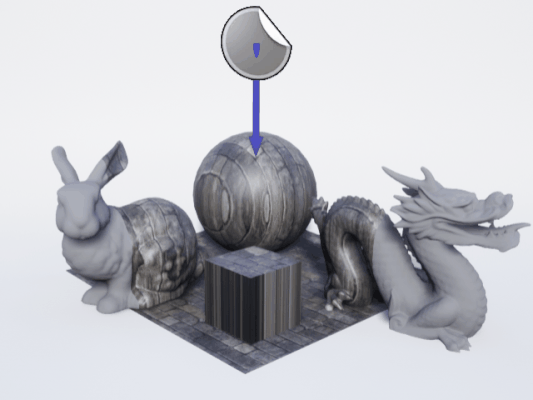
Recently I’ve been helping my friends implementing a better decal projection in Unreal Engine as the default decal projection is fairly limited. It is causing stretching pattern on the parallel surface as projection intended to be.
A potential solution was presented by my teammate about using triplanar/biplanar projection on the decal to wrap the pattern all around the object that affected by the decal. Biplanar projection is particularly tempting as it is requiring only 2 texture sampling comparing with 3 in triplanar.
…is based on the same three projections but uses only two texture fetches at the cost of some extra arithmetic, which is probably a good trade-off between computation and bandwidth
The main reference material we found is once again iq’s blog: biplanar mapping.
I won’t cover the algorithm here but how to port the code over to Unreal Engine as a documentation of the workflow.
This post I will take this task as a case to document the process but porting Shadertoy can be more complicated when involving volume textures, multipasses etc. Will cover in future porting cases.
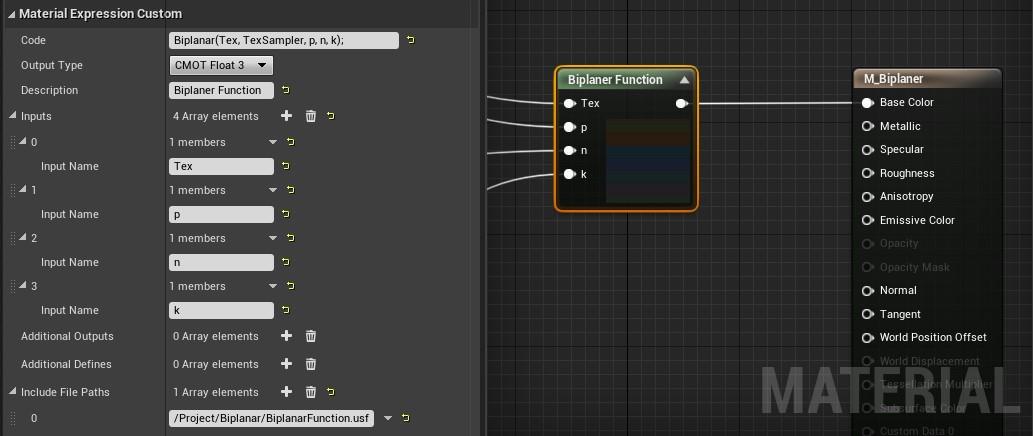
Config custom node
Refer to Unreal Engine Custom Node for details.
I usually wrap my hlsl code in a function and just call the function the code block. This way I can leave the shader path at Include File Paths instead of using #include statement in the code block.
Code converting
Shadertoy code is GLSL and custom node is accepting HLSL. Simplified code to port is:
vec4 biplanar( sampler2D sam, in vec3 p, in vec3 n, in float k )
{
    // grab coord derivatives for texturing
    vec3 dpdx = dFdx(p);
    vec3 dpdy = dFdy(p);
    n = abs(n);

    // major axis (in x; yz are following axis)
    ivec3 ma = (n.x>n.y && n.x>n.z) ? ivec3(0,1,2) :
               (n.y>n.z)            ? ivec3(1,2,0) :
                                      ivec3(2,0,1) ;
    // minor axis (in x; yz are following axis)
    ivec3 mi = (n.x<n.y && n.x<n.z) ? ivec3(0,1,2) :
               (n.y<n.z)            ? ivec3(1,2,0) :
                                      ivec3(2,0,1) ;

    // median axis (in x;  yz are following axis)
    ivec3 me = ivec3(3) - mi - ma;

    // project+fetch
    vec4 x = textureGrad( sam, vec2(   p[ma.y],   p[ma.z]),
                               vec2(dpdx[ma.y],dpdx[ma.z]),
                               vec2(dpdy[ma.y],dpdy[ma.z]) );
    vec4 y = textureGrad( sam, vec2(   p[me.y],   p[me.z]),
                               vec2(dpdx[me.y],dpdx[me.z]),
                               vec2(dpdy[me.y],dpdy[me.z]) );

    // blend and return
    vec2 m = vec2(n[ma.x],n[me.x]);
    // optional - add local support (prevents discontinuty)
    m = clamp( (m-0.5773)/(1.0-0.5773), 0.0, 1.0 );
    // transition control
    m = pow( m, vec2(k/8.0) );
	return (x*m.x + y*m.y) / (m.x + m.y);
}
Data type
First we need to translate the data type syntax:
vec3tofloat3ivec3toint3
Functions
Certain functions are also named differently:
dFdx()toddx()dFdy()toddy()
mix()tolerp()fract()tofrac()mod()tofmod()clamp(x, 0., 1.)tosaturate()// seemsclampworks in UE
Textures
Texture data:
sampler2DtoTexture2D
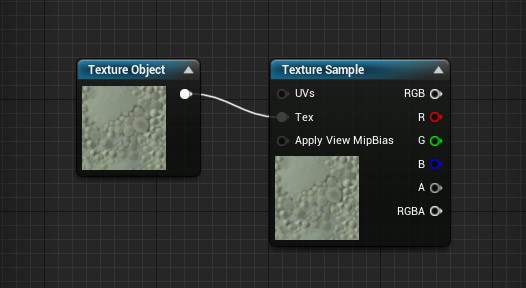
Texture2D type is called a Texture Object in Unreal. Don’t confused against a Texture Sampler node:
Texture sampling:
texture2D()toTexture2DSample(Tex, TexSampler, UV)Tex.Sample(TexSampler, UV)// recommended
Direct3D 9 uses intrinsic texture functions to perform texture operations. This example is from the BasicHLSL Sample and uses tex2D(s, t) (DirectX HLSL) to perform texture sampling.
Output.RGBColor = tex2D(MeshTextureSampler, In.TextureUV) * In.Diffuse;Direct3D 10 uses templated texture objects instead. Here is an example of the equivalent texture operation.Output.RGBColor = g_MeshTexture.Sample(MeshTextureSampler, In.TextureUV) * In.Diffuse;
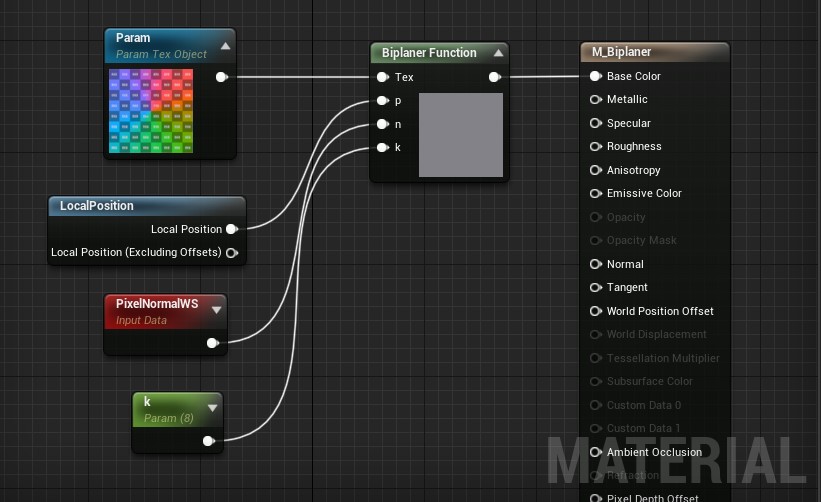
Note that in Unreal each texture object Tex will automatically define a correponding sampler called TexSampler, just add “Sampler” behind the texture obj name. And it has to be explicitly passed into the function call as in Tex.Sample(TexSampler, UV).
Here textureGrad() need to be replaced by Tex.SampleGrad(TexSampler, UVs, ddx(UVs), ddy(UVs)); (alternative tex2Dgrad)
Syntax
Note that in GLSL you can initialize vecter with all elements in same value like vec2(1.) ( aka vec2(1., 1.)) but in HLSL you cannot. quick hack is to do (1.).xx for initializing float2(1., 1.).
Final code (Biplanar Projection)
// https://www.shadertoy.com/view/ws3Bzf

// "p" point being textured
// "n" surface normal at "p"
// "k" controls the sharpness of the blending in the transitions areas
// "s" texture sampler // tex_inSampler

float4 Biplanar(Texture2D Tex,  SamplerState TexSampler, float3 p,  float3 n,  float k )
{
    // grab coord derivatives for texturing
    float3 dpdx = ddx(p);
    float3 dpdy = ddy(p);
    n = abs(n);

    // major axis (in x; yz are following axis)
    int3 ma = (n.x>n.y && n.x>n.z) ? int3(0,1,2) :
               (n.y>n.z)            ? int3(1,2,0) :
                                      int3(2,0,1) ;
    // minor axis (in x; yz are following axis)
    int3 mi = (n.x<n.y && n.x<n.z) ? int3(0,1,2) :
               (n.y<n.z)            ? int3(1,2,0) :
                                      int3(2,0,1) ;

    // median axis (in x;  yz are following axis)
    int3 me = int3(3,3,3) - mi - ma;

    float4 x = Tex.SampleGrad( TexSampler, float2(p[ma.y],p[ma.z]), float2(dpdx[ma.y],dpdx[ma.z]), float2(dpdy[ma.y],dpdy[ma.z]) );
    float4 y = Tex.SampleGrad( TexSampler, float2(p[me.y],p[me.z]), float2(dpdx[me.y],dpdx[me.z]), float2(dpdy[me.y],dpdy[me.z]) );

    // blend and return
    float2 m = float2(n[ma.x],n[me.x]);

    // optional - add local support (prevents discontinuty)
    m = clamp( (m-0.5773)/(1.0-0.5773), 0.0, 1.0 );

    // transition control
    m = pow( m, (k/8.0).xx);
    m = float2(pow(m.x, (k/8.0)),pow( m.y, (k/8.0)));

    return (x*m.x + y*m.y) / (m.x + m.y);
}
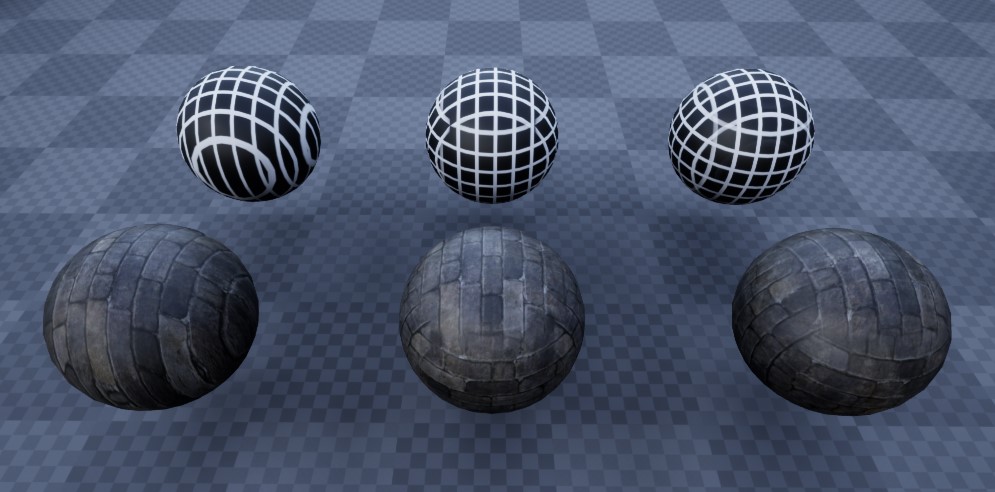
Triplanar Projection
// https://www.shadertoy.com/view/MtsGWH

float4 boxmap( Texture2D Tex,  SamplerState TexSampler, float3 p,  float3 n,  float k )
{
    // project+fetch
	float4 x = Tex.Sample(TexSampler,p.yz);
	float4 y = Tex.Sample(TexSampler,p.zx );
	float4 z = Tex.Sample(TexSampler,p.xy );

    // and blend
    n = abs(n);
    float3 m = float3(pow( n.x,k ),pow( n.y,k ),pow( n.z,k ));
	return (x*m.x + y*m.y + z*m.z) / (m.x + m.y + m.z);
}
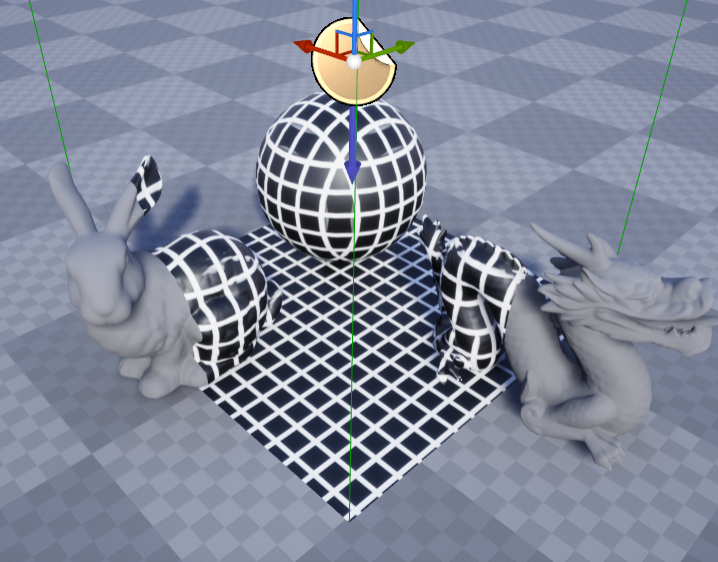
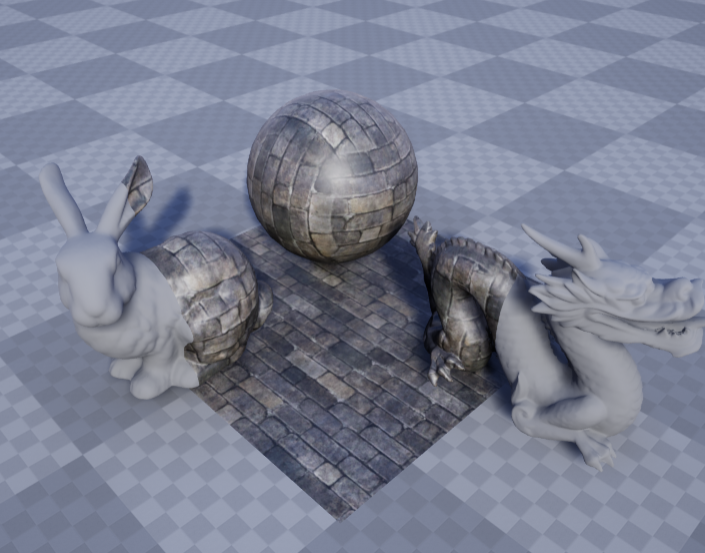
Comparison
Apply to decal!
More pitfalls applying the shader to decal actors in Unreal Engine.
To be continued…