

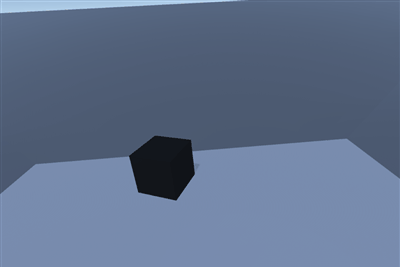
In VR development, because the motion of the first person character is precisely mapping the real players’ body(mainly hands) movement, the environment collision will never be able to prevent the player model from intersecting with the surrounding meshed. This is a well-accepted limitation of VR technique, however I personally feel it is a bit annoying if there is nothing done visually to address this fact.
During my current VR project, I was trying to create an effect to “soften out” the harsh clipping when players interact with the environment. This problem has been well addressed by this amazing post.
The post provides several solutions to this issue and are all very practical and effective:
- Use Depth Expressions to highlight the intersection;
- Use texture mask to highlight the finger tips;
- Add responsive meshes at the intersecting points.
Here in the post I want to cover more details about the implementation and troubleshooting of the first 2 solutions.
Use Depth Expressions to Highlight the Intersection
Unreal Depth Expressions
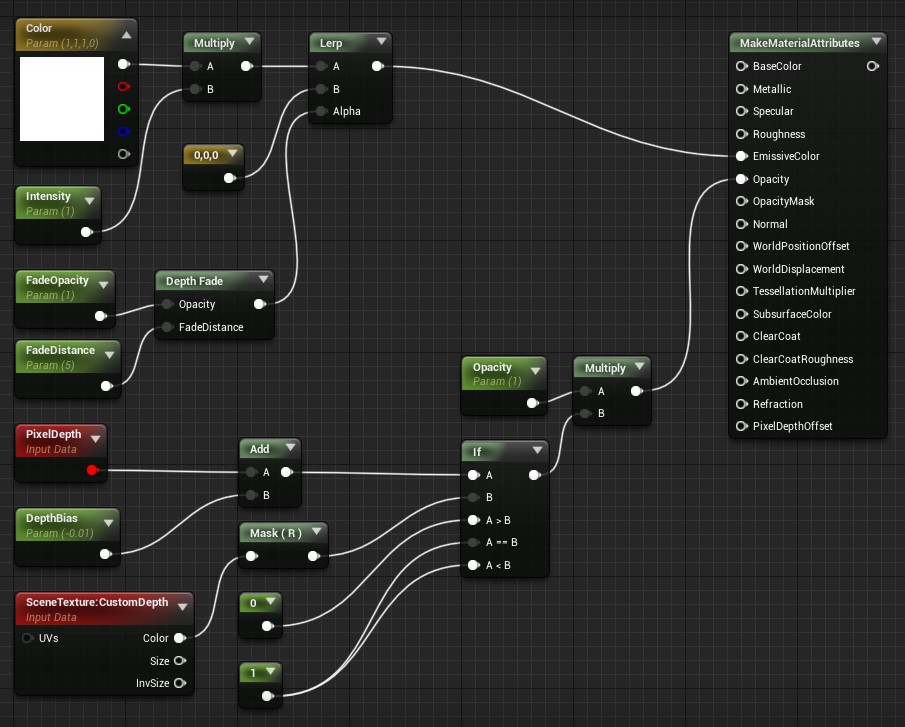
Unreal’s depth expressions are extremely simple to use yet very versatile on creating effects like intersection highlight, enegery field/shield, scanning field etc.
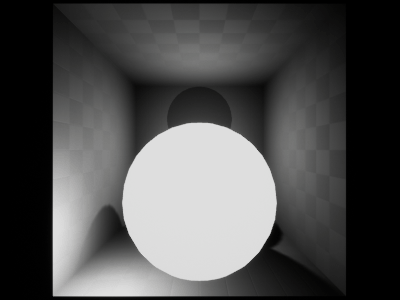
Pixel Depth
The PixelDepth expression outputs the distance from the camera to the pixels currently being rendered.
The values it returns are very big and not normalized, so if you plug it into color output the result will be all blown out. You have to devide it with a big number and clamp it to get a proper look.
![]()
![]()
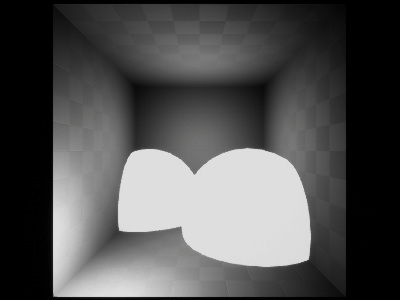
Scene Depth
The SceneDepth expression outputs the existing scene depth. This is similar to PixelDepth, except that PixelDepth can sample the depth only at the pixel currently being rendered, whereas SceneDepth can sample depth at any location.
If an object has material outputing SceneDepth as color (after scaling and clamping), because of this feature, the output can show the objects that occluded. Also because it’s accessing the scene depth, the material using this expression should use translucent as its blend mode to avoid itself writing the depth buffer.
Only translucent materials may utilize SceneDepth!
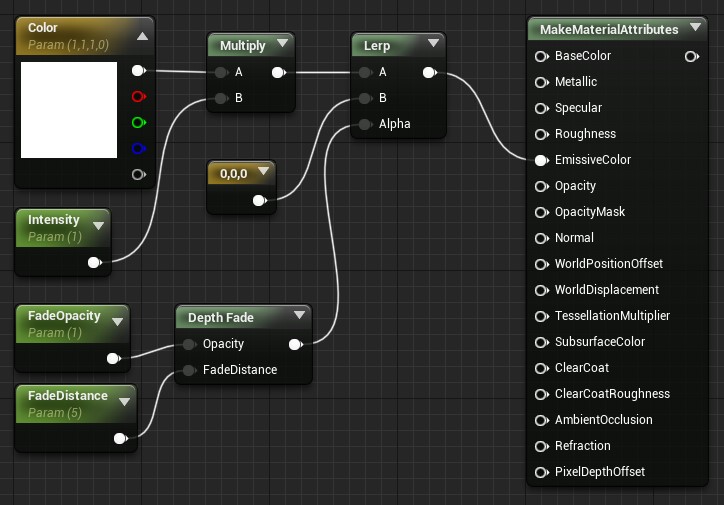
Depth Fade
DepthFade is a packed-up node used to fade a transparent object according to scene depth pass, to soften the seam where it intersects with opaque object.
Combined with other tricks, this node can help to achieve all sorts of cool FX like energy fence/shield etc.
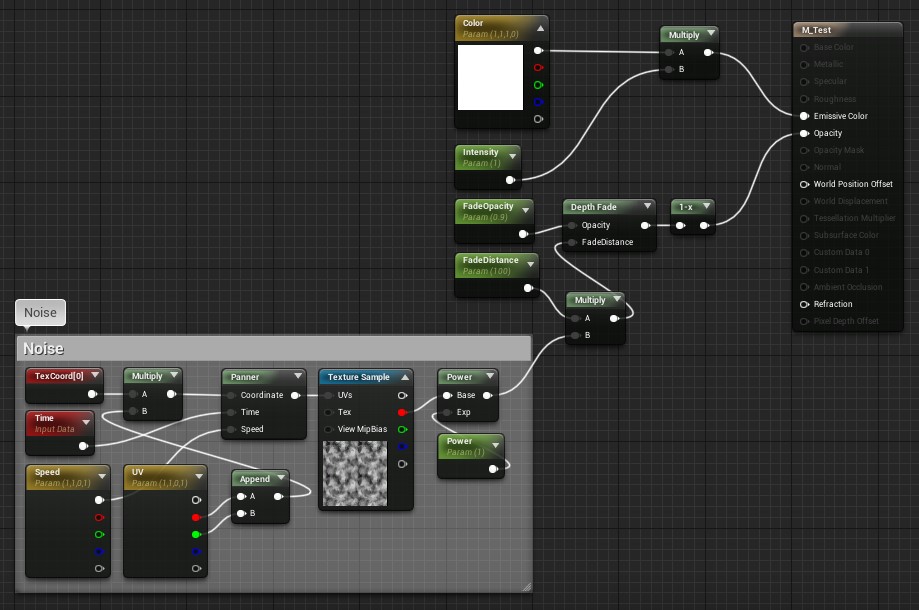
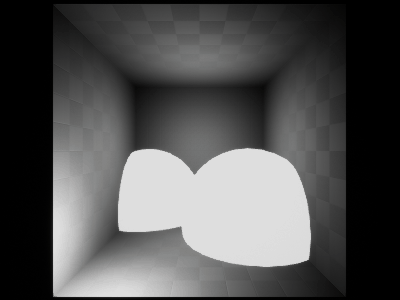
Creating the intersection hightlight
After going through all the above concept, let’s create the intersection hightlight on a hand. Just simply use DepthFade node to lerp the emissive output.
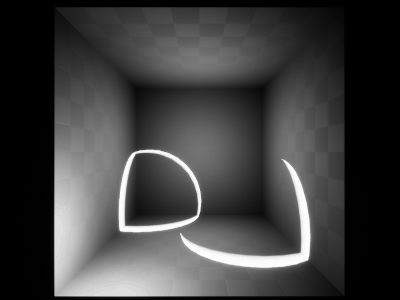
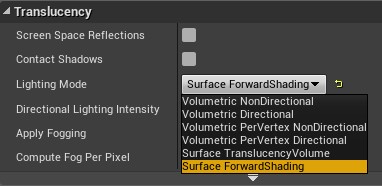
However, this causes issues that because DepthFade requires material to be translucent, the final rendering has serious lighting and sorting problems. The sorting issue is a common problem to encounter while working with transparency in Unreal, and is also a known limitation of the engine. Tom Looman’s Amazing Post explains the solution very well and here I am going to document my way of implementation for future reference.
To fix the translucent material lighting problem, just change the translucency lighting mode to Surface ForwardShading.
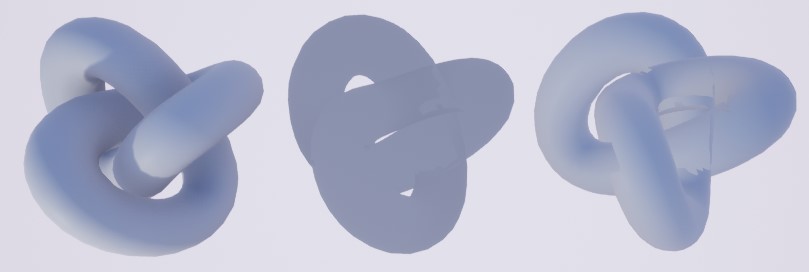

Now the lighting is correct but we still have ugly self-sorting bug. To fix this problem, we need to use a little trick with custom depth buffer. Basically you can label certain mesh components to be written into custom depth buffer and later to be accessed in material editor through SceneTexture:CustomDepth node.
Since the engine itself cannot handle self-sorting for translucent objects, we can calculate by ourselves. Just create a duplicated dummy mesh and set it to be rendered in custom depth buffer but not rendered in the main pass. Note that because we want the custom depth to have the correct sorting, we have to assign a opaque material to the dummy mesh.
I also tend to parent the dummy mesh under the original mesh and name it “DepthFix”.

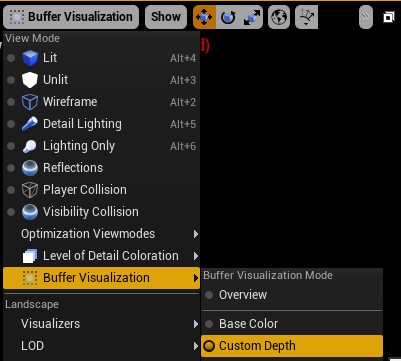
You can visualize the custom buffer in the editor, and then you will see the dummy mesh got rendered there.

Next, in the material, calculate transparency based on PixelDepth and CustomDepth and output into Opacity. The idea is to compare the pixel depth of the wrong-sorted geometry with the custom depth of the dummy geometry. Because the custom depth right now provides the correct sorting information thanks to our opaque dummy mesh, we can:
- set the final opacity 1 when
PixelDepth<=CustomDepth, meaning the rendered pixel belongs to the surface that is closer to the camera and should not be discared because of the occlusion. - set the final opacity 0 when
PixelDepth>CustomDepth, meaning the rendered pixel actually is farther than its depth value and should be blocked by the front surface of the mesh.
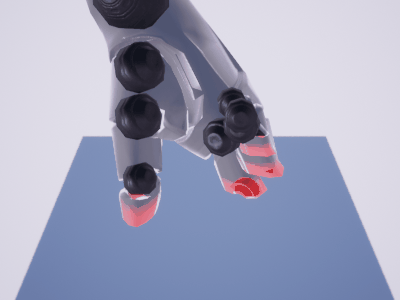
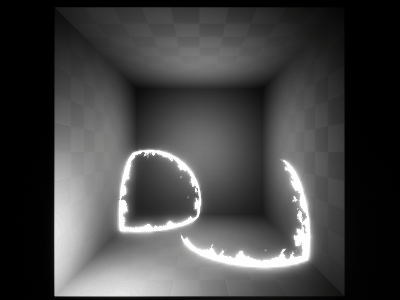
Now with all the work above, we have a nice intersection highlight effect that
- Use
DepthFadeto get the intersection - Use
ForwardShadinglighting mode to fix the translucent lighting problem - Use dummy mesh and
CustomDepthto fix the self-sorting problem
Note that any operation you did with the original mesh, like play animation, you have to apply to the dummy mesh as well to keep both of them in sync!

TBC